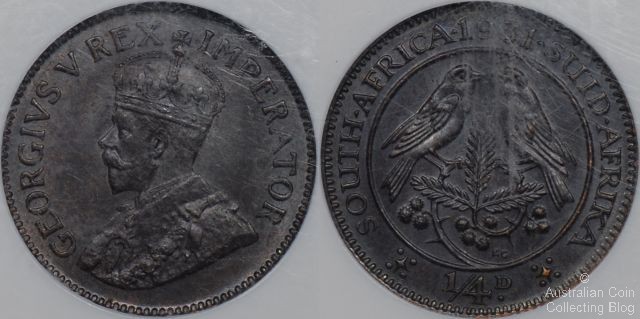
Slab Before Polishing
Above you can see a pretty little South African farthing from 1931. Well, actually you can't see it, what you can see is a brown coin behind some very scratched plastic. Scratched or scuffed slabs are a typical problem, especially with older slabs or those that have not been cared for properly. One of the huge advantages of slabs is that this damage is done to the plastic that encases the coin rather than the coin itself. One of the dis-advantages with scratched slabs is that taking images of the coins within is problematic at best, and as seen above the coin is largely obscured.
We'd read about other coin collectors having using normal car cut and polish compound on both PCGS and NGC slabs given that the technique used to polish the plastic is correct. So, to test this out for ourselves we went down to our local car parts shop and bought some Polyglaze Cut and Polish. We applied small amounts of polish to a soft cloth and worked it onto the surface of the above slab. We made sure to polish up and down rather than from side to side or in circles. The reasoning behind this was that we light all our coins from the top when imaging and we tried to align our polishing lines in the same direction. This would ensure that the lines would not show up in the images due to light reflections.
Each side was polished for several minutes until (to our eyes at least) the worst of the slab scratches were removed. You can see the results below.
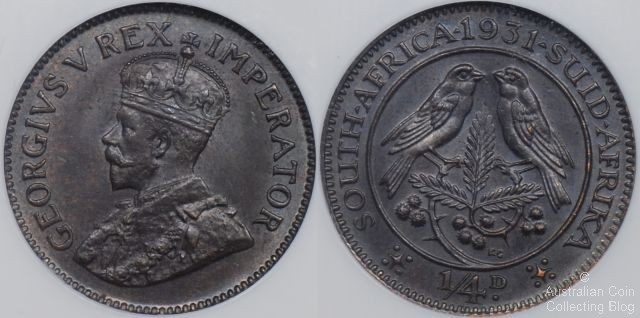
Slab After Polishing
We're sure that you'll agree that the results are pretty impressive. So, don't go out and drop a lot of cash on expensive specialised slab polish, just head down to your local car parts shop and get what you need to remove the scratches and scuffs from your slabbed coins!
Posted by mnemtsas at August 22, 2011 11:07 AM
Subscribe to our Newsletter